Let me tell you a story that still makes me sigh every time it crosses my mind. Back in 2020, I paid a small fortune to have a company build my website for me. At the time, I had no idea where my domain (that's your web address, like yourname.com) was even registered, which account it lived in, or who actually controlled it. I just assumed someone was taking care of it. Then that company shut down. When I tried to take my own domain back and manage it myself, just finding the account and proving I owned it dragged on for nearly two months.
That whole mess taught me a lesson I've never forgotten: your domain is the key to the front door of your entire website. If you don't hold that key yourself, you don't really own anything. From that point forward, I've personally registered the domain for every single website I've launched, and I've never let anyone else hold that key again.
So this is the guide I wish someone had handed me in 2020. I'm going to walk you through what a domain registrar actually is, why I keep coming back to Namecheap for buying domains, exactly how to purchase one step by step, and how to point it at your hosting with DNS. I'll also be honest about the downsides, because there are a few. Let's get into it.
What Is a "Domain Registrar," and Why You Can't Just Buy Anywhere
Think of a domain like the street address of your house. A domain registrar is the company that officially registers that address for you through ICANN, the international body that governs domain names worldwide. You don't deal with ICANN directly. The registrar is the middleman who handles the paperwork, keeps your registration valid, and gives you the dashboard where you manage everything.
Here's the thing: not all registrars are created equal, and choosing badly can cost you later. After getting burned once, I now judge every registrar on three things:
- Transparent pricing. The first-year price is often a teaser. What really matters is the renewal price, year after year.
- Privacy protection. When you register a domain, your name, email, and address can end up in the public WHOIS database. A good registrar shields that for free.
- Fair transfer policy. If you ever want to move your domain elsewhere, the registrar shouldn't make it painful or hold it hostage. (Ask me how I know.)
Quick reality check: Whoever holds the registrar account holds your domain. If a freelancer or agency registers it "on your behalf" inside their account, you don't truly own it. Always register your domain in an account that belongs to you, with your email and your credit card. This one rule would have saved me two months of pain.
Why I Recommend Namecheap for Buying Domains
I've used several registrars over the years, and Namecheap is the one I keep recommending to beginners and friends starting their first site. It's not perfect (I'll get to the warts later), but for simply registering and owning a domain, it nails the three things that matter most. Here's why.
1. It's Cheap, and I Mean Genuinely Cheap
A .com domain on Namecheap runs around $9.58 USD for the first year, and promotional pricing sometimes dips to about $6.79 USD. Renewal sits around $13.98 USD per year, plus ICANN's small fixed fee of about $0.20 USD. That's it. No surprise "setup fees," no sneaky line items that triple your total at checkout.
I want to be clear, though: the first-year price is the bait that gets everyone in the door. What you actually care about is the renewal price, because you'll be paying that every year for as long as you keep the domain. Namecheap's renewal is reasonable and predictable, which is exactly what I want.
2. Free WHOIS Privacy Protection (This Is My Favorite Part)
This is the feature I love most. Namecheap includes free, permanent WHOIS privacy through a service called "Withheld for Privacy" (you may remember it as WhoisGuard). It keeps your personal details (name, home address, phone number, email) out of the public WHOIS lookup, so spammers and scammers can't scrape them.
A lot of registrars treat privacy as a paid upsell, charging you an extra fee every year to hide information that arguably shouldn't be public in the first place. Namecheap gives it to you for free, for life, on supported extensions. That's a real, recurring saving, not a one-time gimmick.
3. ICANN Accredited, Two-Factor Auth, and 24/7 Support
Namecheap is ICANN accredited, supports two-factor authentication (2FA) to lock down your account, and offers 24/7 support in English. In my experience, live chat usually connects within about five minutes, which matters a lot when something time-sensitive (like a domain about to expire) goes wrong at 2 a.m. The first thing I do after buying any domain is turn on 2FA. Your domain account is the master key to your online presence, so treat it like online banking.
Namecheap vs GoDaddy vs Cloudflare vs Local Registrars: Comparison Table
To give you the full picture, here's how Namecheap stacks up against the other common choices. I've kept this in plain terms so you can see the trade-offs at a glance.
| Factor | Namecheap | GoDaddy | Cloudflare | Local / Country Registrar |
|---|---|---|---|---|
| .com first year | ~$9.58 | Cheap "bait" pricing | ~$10.46 | Often $20+ |
| .com renewal | ~$13.98+ | ~$19.99 | ~$10.46 (at cost, no markup) | High and inconsistent |
| Free privacy | Yes, for life | Often a paid add-on | Yes, by default | Varies by registrar |
| DNS flexibility | High | High | Limited (must use Cloudflare's nameservers) | Moderate |
| Interface / support | English UI, English 24/7 support | Mixed, aggressive upsells | English, developer-focused | Local language, phone support |
| Best for | Beginners, small sites | Not recommended | Cost-conscious, advanced users | Strong local brand image |
A few honest notes on this table:
- GoDaddy: I no longer recommend it. The pricing is full of upsells, privacy is often something you pay extra for, and recent terms-of-service changes have pushed individual users toward "commercial" classifications. It just isn't worth the hassle anymore.
- Cloudflare: Genuinely the cheapest option long-term because they sell domains at cost with no markup, and privacy is on by default. The catch is that you must use Cloudflare's nameservers, which makes DNS less flexible. It's a great pick if you're comfortable being all-in on Cloudflare and a bit more technical.
- Local registrars: If you specifically want a country-code domain (like a regional .co.uk, .de, or .com.au) for a strong local-business image, a local registrar can make sense. Just expect higher prices, older interfaces, and privacy that may not be free.
How to Buy a Domain on Namecheap: Step by Step
Buying a domain is genuinely quick once you know what to watch for. Here's exactly how I do it.
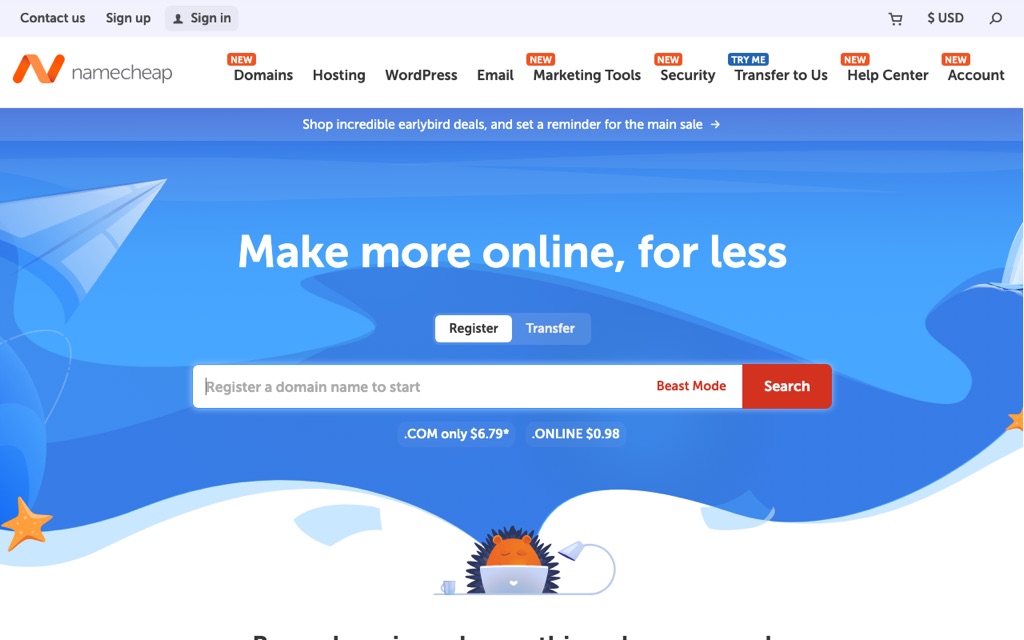
- Search for your domain. On the Namecheap homepage, type the name you want and hit search to see if it's available.
- Check the renewal price before anything else. This is the single most important step, so I'm repeating it on purpose. The first-year deal looks great, but scroll down and confirm what you'll pay at renewal. Budget for that number, not the teaser.
- Confirm domain privacy shows as "Free." It should be included automatically. If you don't see it, double-check before paying.
- Turn off the add-ons you don't need. Namecheap will offer hosting, SSL, premium DNS, and email at checkout. For now, you just want the domain, so uncheck the extras. You can always add services later.
- Create your account and pay. Register with your own email, then pay by credit card or PayPal.
- Verify your email. ICANN requires you to confirm your email address via a verification link. Don't skip this. If you ignore it, your domain can get suspended.
- Enable two-factor authentication immediately. Lock the account down before you do anything else.
My personal habit: the moment I finish buying a domain, I switch renewal to "auto-renew" and confirm my payment card is valid. A domain expiring and getting snapped up by someone else is the most painful, hardest-to-recover disaster there is. I never leave it to chance.
DNS Setup: Pointing Your Domain at Your Hosting
Buying the domain is only half the job. Now you need to tell the internet where your website actually lives by configuring DNS. There are two common ways to do this. For most beginners, method one is the way to go.
Method 1: Changing Nameservers (Most Common, Best for Beginners)
This hands DNS control over to your hosting provider, which is the simplest approach. Here's how:
- Log into your Namecheap account.
- Go to Domain List, find your domain, and click Manage.
- Find the Nameservers section and choose Custom DNS from the dropdown.
- Enter the nameserver addresses your hosting provider gave you (usually something like ns1.yourhost.com and ns2.yourhost.com).
- Save, then wait 24 to 48 hours for the change to propagate globally (it's often much faster than that).
The big advantage: your host now manages your email, SSL, and other records automatically. It's the most hands-off option, which is exactly what you want when you're starting out.
Method 2: Setting an A Record (When You Have a Server IP)
Use this when your hosting provider gives you an IP address instead of nameservers. For this to work, you keep Namecheap's BasicDNS as the nameserver provider.
- Open the Advanced DNS tab.
- In the Host Records section, click Add New Record.
- Set Type to "A Record," set Host to "@" (for your root domain) or "www" (for the www version), and set Value to your server's IP address.
- Save. Changes on Namecheap's BasicDNS usually propagate in about 30 minutes.
Don't forget: Create a record for both @ and www so that yoursite.com and www.yoursite.com both load correctly. Forgetting the www version is one of the most common beginner mistakes, and it makes it look like half your visitors hit a dead link.
Connecting Your Domain to WordPress Hosting: Full Process
If your goal is a WordPress site (which it probably is), here's how the domain and hosting come together:
- Open your hosting plan and add the domain to your account (look for an "Add Domain" or "Assign Domain" option).
- Go back to Namecheap and set up DNS using Method 1 above, entering your host's custom nameservers.
- Wait for DNS propagation to finish.
- Install WordPress from your hosting control panel (most hosts offer a one-click installer).
- Turn on the free SSL certificate (Let's Encrypt) so your site loads securely over https://.
That's the whole loop: buy the domain at Namecheap, get hosting from a dedicated host, and connect the two with DNS. If you want the complete walkthrough for building the actual site, I cover it end to end in my complete guide to building a WordPress website.
.com or a Country Domain? How to Choose
People agonize over this far more than they need to. Here's my simple framework.
Go with .com if:
- Your audience reaches beyond a single country.
- You want instant international credibility.
- You want the lowest cost.
- You want that lifetime-free privacy protection.
A .com is the most globally recognized extension and the easiest for people to remember. For 95% of beginners, it's the right call.
Consider a country domain (like .co.uk, .de, or .com.au) if:
- You're a registered local business operating in that country.
- You serve a strictly local customer base.
- You need that strong "official, locally based business" perception.
Country domains often cost more (frequently $20+ a year) and may not include free privacy. So weigh the branding benefit against the extra cost.
My honest advice for beginners on a budget: just start with a .com. You build trust through great content and great service, not through a fancy domain extension. Nobody ever chose a business because of its TLD.
Namecheap Review: The Honest Pros and Cons
I don't believe in pretending a product is flawless, so here's the straight talk.
The downsides:
- The interface is entirely in English. Not a problem for most readers, and your browser's translate feature handles it fine if needed.
- Namecheap's own hosting is not their strong suit. It tends to run on older architecture (Apache, basic SSD rather than fast NVMe), and the renewal price roughly doubles after year one. So I'll say it plainly: use Namecheap for domains only, and get your hosting from a specialist host.
- Like the whole industry, there's a gap between the promotional first-year price and the renewal price. It's not unique to Namecheap, but you should always plan for the renewal number.
The upsides:
- Genuinely affordable domain pricing.
- Free WHOIS privacy, for life.
- Two-factor authentication to secure your account.
- Flexible DNS, whether you change nameservers or set records yourself.
- 24/7 support that actually responds quickly.
Net-net: for the narrow job of registering and owning a domain, Namecheap is one of the best-value choices out there.
Frequently Asked Questions
What happens if my domain expires and I don't renew?
Your domain enters a grace period first, during which you can usually still renew it (sometimes with a redemption fee). But if you let that window close, the domain gets released and anyone can register it, including competitors or domain squatters who'll then try to sell it back to you at a premium. This is exactly why I beg you to turn on auto-renewal and keep a valid payment card on file. It's the cheapest insurance you'll ever buy.
Can I transfer a domain from another registrar to Namecheap?
Yes. You'll need to unlock the domain at your current registrar, grab the EPP/Auth code, and then start the transfer from Namecheap's side. A couple of rules to know: a domain generally must be registered for at least 60 days before it can be transferred, and a transfer usually extends your registration by one additional year, so you're not losing time you've already paid for.
Is the free privacy protection really free, with no hidden charges?
Yes, it's genuinely free for life via "Withheld for Privacy" (formerly WhoisGuard). It's supported on the common extensions like .com, .net, and .org. Some specialized or country-code extensions don't support privacy at the registry level, so on those it may not be available, but that's a limitation of the extension, not a sneaky upcharge from Namecheap.
How long do DNS changes take to go live?
It depends on what you changed. Switching nameservers can take 24 to 48 hours to propagate worldwide, though in practice it's often done within a few hours. Editing an A record on Namecheap's BasicDNS is much faster, usually around 30 minutes. If your site isn't loading right after a change, give it a little time before you start panicking.
Conclusion: For Beginners, Namecheap Is a Solid First Stop
Let me bring this back to where I started. The big lesson from my 2020 disaster is simple: always keep control of your own domain. Don't let an agency, a freelancer, or anyone else hold that key for you. Register it yourself, in your own account, with your own card.
The strategy I follow now, and the one I'd hand to anyone starting out, is this: buy your domain at Namecheap, get your hosting from a dedicated host, and connect the two with DNS. It keeps your costs low, keeps your setup flexible, and most importantly, keeps the front-door key firmly in your hands.
So go check whether the name you want is still available. Good names don't tend to wait around for anyone, and the worst feeling is finding the perfect name a week too late. Once your domain is sorted, head over to my complete guide to building a WordPress website and let's get your actual site online.